How to Upgrade PHP on your AWS Lightsail Instance
I love Lightsail. I really do. It has allowed a barely technical person like me to spin up a VPS for my hobby blog and pay only a few dollars a month for it.
However, recently I found the catch — I updated my WordPress and was alerted that the PHP version it was on is reaching end-of-life and has not been receiving security support since end of last year. No problem, I’ll just upgrade PHP… There must be a button to just click somewhere, right?
To my dismay, upgrading PHP on Lightsail isn’t as easy. As Lightsail instances are packed with Bitnami, in order to have my blog run on the newer PHP versions, I have to spin out a new instance and migrate my data from the old instance to that new one.
Sounds tedious? Yeah it was, mainly because my blog relies a lot of images. Images that are hosted on WordPress itself, so migrating data means I have to migrate almost 1,400 images along the rest of my WordPress setup.
But in the end, after some trial and error, I did it. And I’m a fan of sharing random knowledge so here’s step-by-step how it went down for me:
1. Create a static IP and attach it to your current Lightsail instance
First of all, do this if you haven’t done so already. It will come in handy for the purpose of migrating your instance, but it may also save you lots of time on other occassions.
Once you’ve created a static IP and attached it to the current Lightsail instance you are using, make sure your DNS / CDN is updated to use this new static IP.
Why use static IP? Read more about static IP here.
2. Spin up a new WordPress Lightsail instance
In Lightsail, click Create Instance, and choose whatever setup you need. Once the new instance is ready (it will take a few minuters), connect to the new instance via SSH and verify that it has the stack you want.
To check the PHP version, you can simply run php -v, like so:

You might also want to check Bitnami changelog to see when this version was released. For example, if it had been released many months ago, it might be worth waiting for the upcoming release so that you’d be on an even more updated stack. However, if it was just released, say, a month ago, then it’s worth going through with the update now as the new ones aren’t likely to come up soon.
If you need refresher on how to setup WordPress on the new instance, you can view Lightsail’s WordPress getting started guide.
3. Prep your current Lightsail instance for import
Below are a few optional steps that might make your life easier. Feel free to comb through them and see if they apply to you!
Optional Step 1: Make sure the images uploaded to your WordPress are optimized
If your blog is image-heavy like mine, ensure all images have been properly re-sized and optimized.
If, again, like me you were once naive and uploaded images at their original sizes of 4–6MB (!!!) then you’ll want to use a plugin to bulk resize the images to be more internet-friendly. This will cut down the import time SEVERELY, which truly is a godsend. For this, I used a plugin called Imsanity and it’s perfect! I recommend setting the max image size to 1400px for both height and width. It’s sufficient for web images.
Some due diligence in using Imsanity: Make sure to test it out on a few images first before going in and resizing all your images. Imsanity will overwrite all your image files, so if you want to keep the original files then you’ll need to back them up first somehow. I didn’t bother doing this since there is no reason why the original images need to be available publicly on the web anyway.
Optional Step 2: Increase Wordpress Memory Limit
For a large blog, you might also want to consider increasing your Wordpress memory limit to prevent your server from running out of memory later during import. You can do this by editing the wp-config file (which is located at /opt/bitnami/apps/wordpress/htdocs/wp-config.php for Lightsail).
Find a line that says:
\* That’s all, stop editing! Happy blogging. *\
and add the following line just above it:
define(‘WP_MEMORY_LIMIT’, ‘256M’);
Where 256M is the desired memory limit. You could set this to higher if you find that your instance is still running out of memory later.
Optional Step 3: Make sure your old and new instance are on the same WordPress version
It’s not necessary, but I figured it couldn’t hurt to move from the same WordPress versions. Bitnami might not come packed with the latest WordPress version, so as soon as I spin up the new instance, I upgraded it to the newest WordPress.
4. Export your old instance data
To export your WordPress, you can use All-in-One WP Migration plugin, or the native WordPress Importer, which comes out-of-the-box and does not require you to install a plugin.
The All-in-One WP Migration plugin sounds like the easiest solution, except in my experience it kept crashing my instance no matter how many times I fiddled with the settings. So I had to use the WordPress Importer out of the box instead and do many things manually.
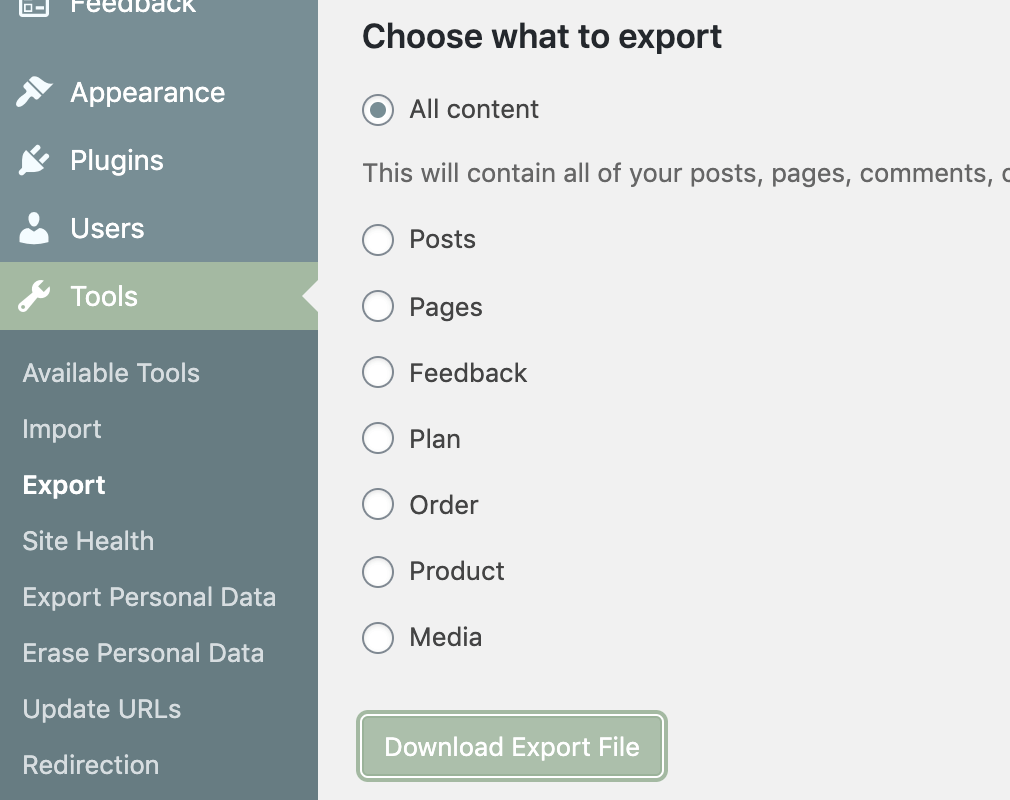
To export using the native importer, it’s very simple: Simply go to Tools > Export and select All content.
Take note of the file size of the exported file. If it’s less than 40MB, you don’t have to do anything. If it’s more than 40MB, you have extra steps to go through in the next section.
5. Import the old instance data into your new instance
To do this, you can go to Tools > Import. Install the importer for Wordpress.
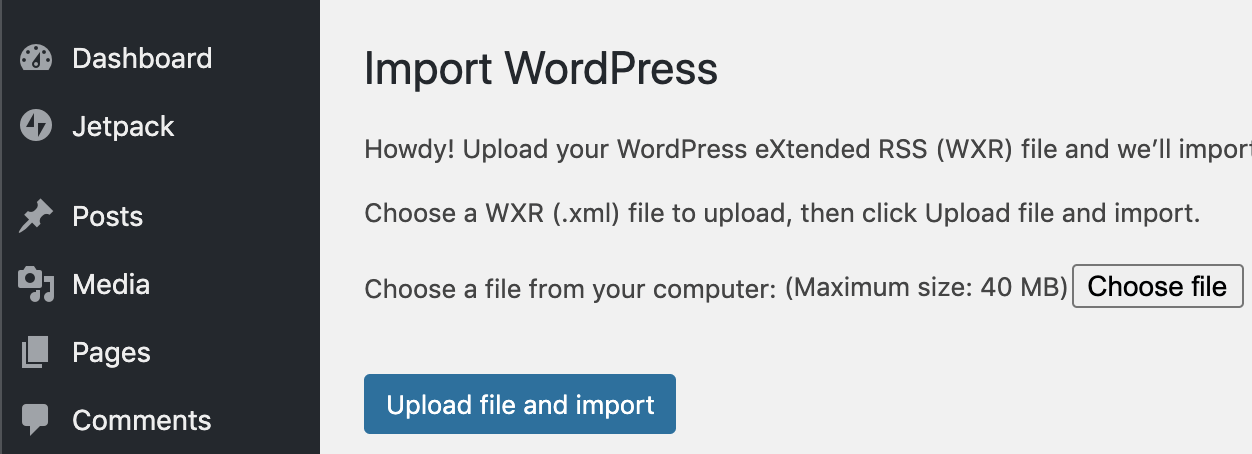
Note that there is a maximum size of 40mb for the export file. You’ll need to modify your php.ini file to allow uploads more than 40mb. Here is an instruction on how to do that. The file is located at /opt/bitnami/php/etc/php.ini for Lightsail.
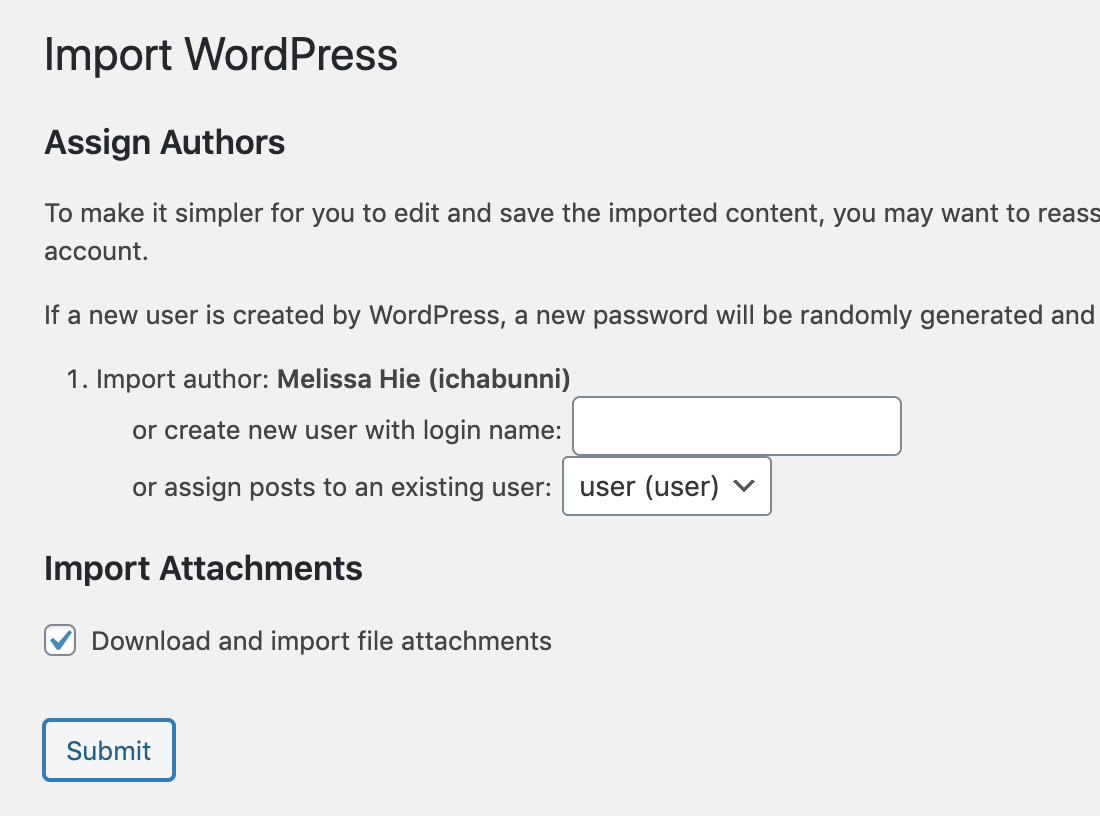
Once the file is uploaded, you’ll go to the second screen which asks you to attribute the author you want the import to go to. Also make sure the “Download and import file attachment” checkbox is checked, otherwise your images might not get attached properly.
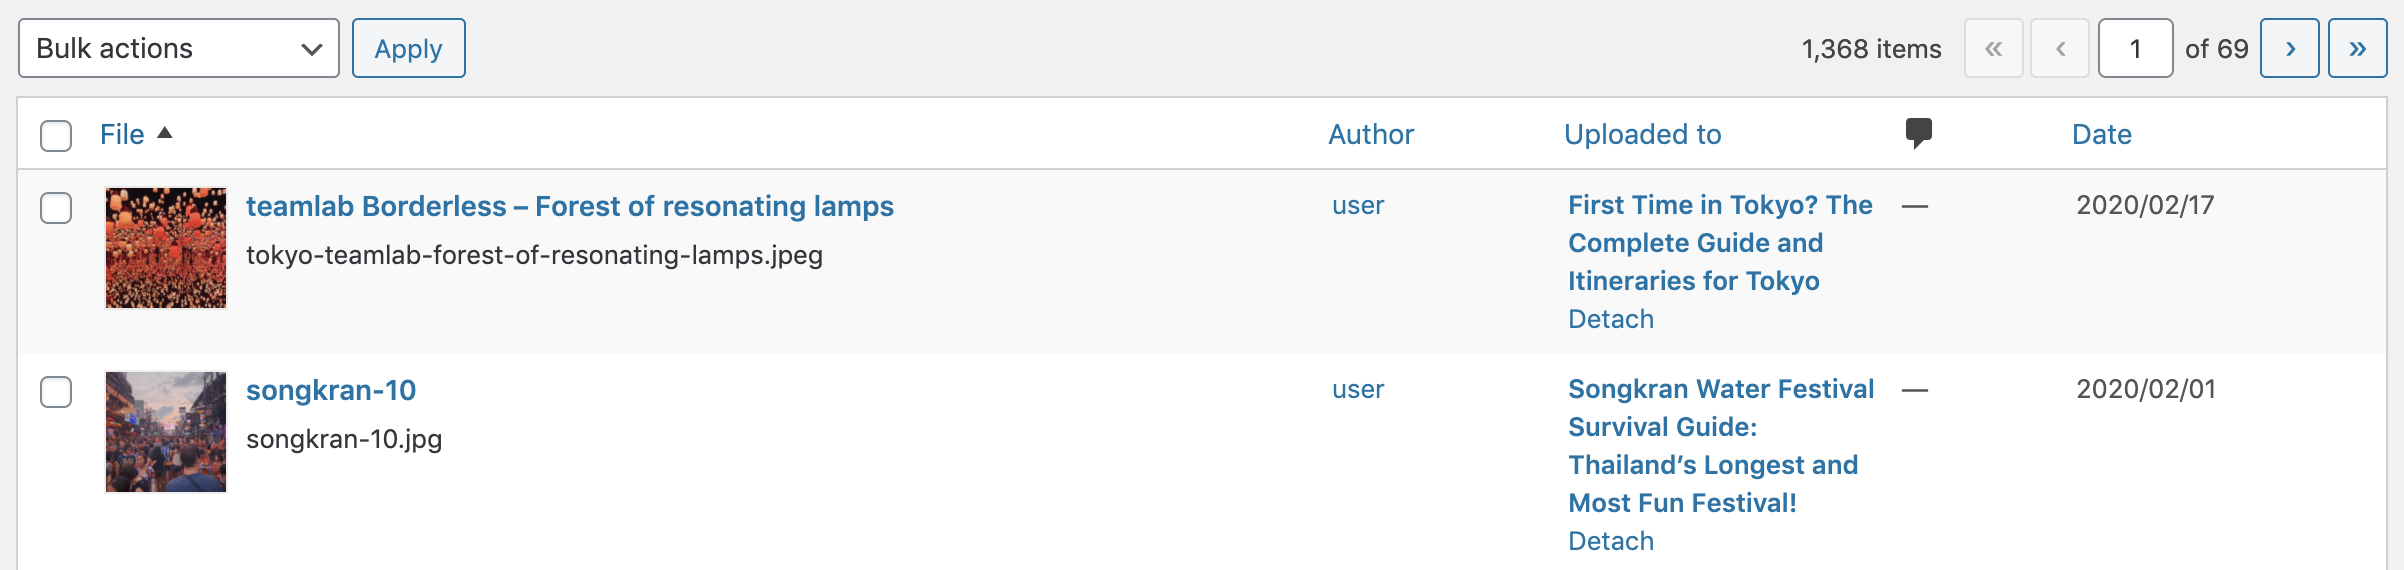
If your WordPress is image-heavy like mine, you might run into a 500 Internal Server error a few minutes into importing. It looks alarming, but if at any point you run into this, just leave it be. In my case, the importer was actually still running in the background. You can verify it’s still running by accessing the Media Library section of your blog in another browser, and refreshing to see if the image count goes up.
Also, if you do take a peek at the Media Library while your importer is still working, don’t be alarmed if your images gets imported as “Unattached”. They will get attached to the right posts at the end of it all.
6. Setup and verify everything is working properly on the new instance
You can first verify that content has been imported to the new instance by comparing the item count on the Media Library is the same between the current and new instances.
Next, you’ll want to setup things on the new WordPress instance so that it mirrors the current instance. If you are using the All-in-One WP Migration plugin, it might have taken care of this for you, but unfortunately it did not work for me :(
A few things you might want to check:
- Have you reinstalled your WordPress theme?
- Have you reinstalled your WordPress plugins?
- Have you checked the WordPress settings in the new instance?
- Have you checked whether the Permalinks structure of your posts and pages are preserved in the new instance?
- If you have any redirects on the old instance setup from WordPress, have you imported these redirects into the new instance?
7. Assign your static IP to the new instance
This is static IP’s time to shine. You only need switch the IP to point to the new instance! No need to wait for DNS to propagate anymore!
Once you are ABSOLUTELY sure everything is working correctly on the new instance, detach the static IP from the old instance and attach it to your new instance. If you had setup your DNS / CDN to the static IP on Step 1, you should then be able to access the new instance from your domain name.
Here is a handy how-to guide on Static IP from Lightsail!
8. Load your domain and verify everything is working
Once again, check that everything is working. I would put a lot of importance on check the front end side of things, since it will affect your SEO. So check that your permalinks are the same as before, redirects are intact, images are loading, your SSL is working, CDN are in place etc.
If you find that your permalinks are all messed up from the import (it might point to the instance IP instead of your domain name) and you need to fix it, you can use plugins like Blue Velvet URL Updater. It’s basically a find-replace for URL for WordPress.
9. Check your SSL Certificate
I use Cloudflare to manage my SSL certificate, so this step was not necessary for me. But if you are managing your own, then make sure your new instance has SSL Certificate too!
…
…
10. … Profit! Your WordPress should now be running on the newer PHP version!
Special thanks to Harry Bailey. I referenced his post, although I still had to troubleshoot here and there since the All-in-one plugin didn’t work for me.